
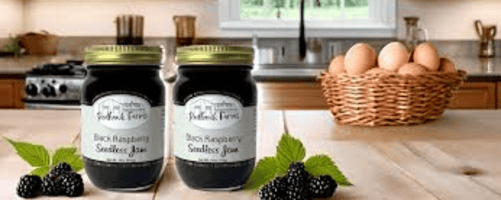
There’s something deeply satisfying about making homemade black raspberry jelly.
It’s not just about the end result though the sight of those rich, purple jars glistening on your shelf is undeniably rewarding, it’s about the journey. From the moment you pick those dark, juicy berries, still warm from the sun to the rhythmic stirring of the pot as the mixture thickens into glossy perfection, every step feels like a celebration of an Oscar award.
The kitchen fills with the sweet-tart aroma of black raspberries, and your hands might end up stained with their vibrant color, but that’s all part of the charm. This isn’t just jelly, it’s a taste of the season at its peak.
Whether you’re spreading it on toast, swirling it into yogurt, or sharing it with loved ones, each jar holds a little piece of the care and patience you poured into it.
So, grab your berries and let’s create something truly special.
What You Need to Know About Black Raspberries
Black raspberries (Rubus occidentalis) are distinct from their red cousins in both appearance and flavor. While they might look similar to blackberries, black raspberries are smaller and have a hollow core when picked, just like red raspberries.
Their flavor is more intense and complex than red raspberries, with wine like notes that make them perfect for preserving. These berries aren’t just delicious – they’re nutritional powerhouses. Packed with antioxidants, particularly anthocyanins, they offer potential anti-inflammatory and cancer-fighting properties.
They’re also rich in fiber, vitamin C, and manganese. The peak season for black raspberries is relatively short, typically spanning just a few weeks in early to mid summer, usually from late June to early July in most regions.
This brief window makes preserving them the more precious.
Ingredients and Equipment
Ingredients:
- cups crushed black raspberries (about 2 quarts whole berries)
- 3 cups granulated sugar
- 2 tablespoons lemon juice
- 1 package (1.75 oz) powdered pectin (optional)
- ¼ cup water
Equipment:
- A large preserving pan or stainless-steel pot
- Jelly strainer or cheesecloth with stand
- 6-8 half-pint (8 oz) canning jars with new lids
- Large canning pot for water bath
- Ladle and wide-mouth funnel
- Candy thermometer (optional but recommended)
- Clean kitchen towels
- Jar tongs and bubble remover
Step-by-Step Recipe
Step 1: Preparing the Berries
Begin by gently washing your black raspberries in cool water, discarding any that show signs of mold or damage.
Don’t soak them – a quick rinse is sufficient.
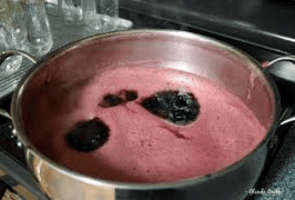
Place the clean berries in a large pot and crush them with a potato masher. Add ¼ cup water to prevent scorching and bring to a simmer over medium heat.
Cook for about 5 minutes, stirring occasionally, until the berries release their juice.
Step 2: Extracting the Juice
This step is crucial for achieving that perfect, crystal-clear jelly. Pour the cooked berries into a jelly strainer or several layers of cheesecloth suspended over a large bowl.
Let the juice drip naturally, resist the temptation to squeeze the bag, as this can make your jelly cloudy. This process typically takes 2-4 hours, though many prefer to let it drain overnight in the refrigerator.
Step 3: Cooking the Jelly
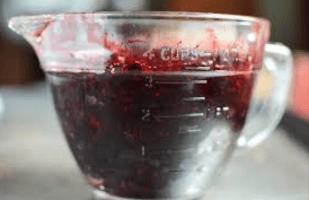
Measure your strained juice you should have about 4 cups. Combine the juice, sugar, and lemon juice in your preserving pan.
If you use pectin, whisk it in now. Over high heat, bring the mixture to a full rolling boil while stirring continuously. This is where attention to detail matters most, a rolling boil is one that cannot be stirred down.
Step 4: Testing for Doneness
There are several ways to test if your jelly is ready. The temperature method involves cooking until it reaches 220°F (or 8°F above boiling point for your altitude).
Alternatively, place a small plate in the freezer before you begin. When you think the jelly is ready, drop a small amount on the cold plate.
If it creases when pushed with your finger after 30 seconds, it’s done.
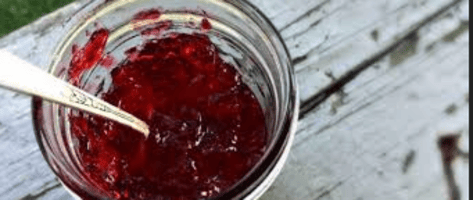
Step 5: Canning and Storing
While your jelly is cooking, prepare your jars by sterilizing them in boiling water. Once the jelly reaches the setting point, skim off any foam and ladle it into hot, sterilized jars, leaving ¼-inch head space.
After cleaning the rims and putting on the lids, process for ten minutes in boiling water.
Tips for Perfect Black Raspberry Jelly
Success in jelly-making often comes down to little details.For naturally sweeter berries, you might want to reduce the sugar slightly.
If you’re skipping commercial pectin, cook the jelly slightly longer and be patient, natural pectin takes time to work its magic. A common mistake is not achieving a full rolling boil.
Don’t be timid here the mixture should be bubbling vigorously even when stirred. However, watch carefully to prevent boil-overs, which can happen quickly with sugar syrups.
Serving Ideas and Uses
While nothing beats a thick layer of black raspberry jelly on warm, buttered toast, don’t limit yourself to breakfast applications. Try it paired with sharp cheddar on a cheese board, swirled into yogurt, or used as a glaze for roasted pork.
For an elegant dessert, warm it slightly and drizzle over vanilla ice cream or use it as a filling between cake layers.
FAQs
How do you make homemade black raspberry jelly from scratch?
To make black raspberry jelly from scratch, you’ll need fresh black raspberries, sugar, lemon juice, and pectin (optional).
Here’s a basic process:
Step 1:
Wash and mash the black raspberries to release the juice.
Step 2:
Strain the mixture through a fine sieve or cheesecloth to remove the seeds.
Step 3:
Combine the juice with sugar and lemon juice in a pot.
Step 4:
Bring it to a boil and cook until it thickens. When using pectin, proceed according to the instructions on the package.
Step 5:
Put the jelly into sterilized jars and seal them tightly.
What’s the difference between black raspberry jam and jelly?
The main difference lies in the texture and ingredients:
Jam:
Includes crushed black raspberries with seeds and pulp, giving it a thicker and chunkier texture.
Jelly:
Made only from the juice of black raspberries, resulting in a smooth and clear consistency.
How can I tell if my black raspberry jelly is ready?
To test if your jelly is ready, you can use the ‘plate test’:
- Chill a plate in the freezer.
- Place a small spoonful of the hot jelly on the cold plate.
- Wait a few seconds and gently push the jelly with your finger. It’s ready if it creases and maintains its shape.
How do I store homemade black raspberry jelly?
Homemade black raspberry jelly should be stored in sterilized, airtight jars. If properly sealed, the jars can be stored in a cool, dark place for up to a year.
Once opened, keep the jelly in the refrigerator and consume it within a few weeks.
Can I make black raspberry jelly without pectin?
Yes, you can make black raspberry jelly without pectin. Black raspberries naturally contain some pectin, so you can thicken the jelly by cooking it longer.
Adding a bit of lemon juice can also help the thickening process since it increases acidity.
Conclusion…
Making black raspberry jelly is more than just a kitchen project, it’s a way of bottling memories. Each jar is a little piece of summer, a burst of sunshine waiting to be opened on a dreary winter day.
Yes, it takes time, patience, and a bit of practice, but the result is worth every sticky counter top and purple stained fingertip. The reward is not just the glistening jars of jelly, but the satisfaction of creating something truly special, something that connects you to the seasons and to the traditions of those who came before you.
So, don’t be afraid to dive in. Start with this recipe, make it your own, and soon enough, you’ll find yourself not just making jelly, but crafting a legacy, one sweet, jewel-toned jar at a time.