
Whether you’re an experienced home cook or just starting your culinary journey, making raspberry jelly is a rewarding endeavor that connects us to time-honored preservation traditions.
The vibrant red hue and bright, tangy flavor of raspberry jelly can transform your morning toast or become the star ingredient in elegant desserts.
In this comprehensive guide, we’ll explore everything you need to know about crafting the perfect raspberry jelly, from selecting the finest berries to troubleshooting common issues.
The Magic of Raspberry Jelly
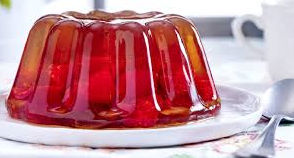
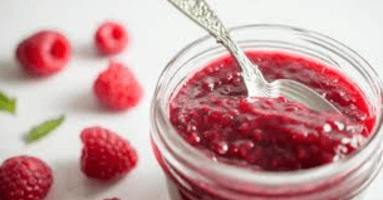
Raspberry jelly holds a special place in home preserving. Unlike jam, which contains fruit pulp, raspberry jelly is prized for its crystal-clear appearance and pure fruit flavor.
The process of making raspberry jelly transforms fresh, ripe berries into a spreadable delight that captures summer’s essence in every jar. This recipe has been perfected through generations of home cooks, combining traditional methods with modern food safety standards.
Essential Equipment for Making Raspberry Jelly
Before starting your jelly-making adventure, gather these tools:
- Large stainless steel or enamel pot
- Jelly bag or cheesecloth
- Large bowl for straining
- Candy thermometer
- Clean mason jars with new lids
- Jar lifter and canning funnel
- Large spoons and ladles
- Potato masher
- Kitchen scale
- pH strips (optional but recommended)
Ingredients for Classic Raspberry Jelly
For approximately 6 eight-ounce jars:
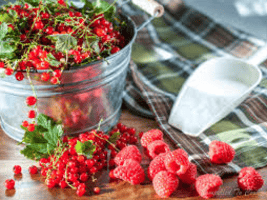
- 4 pounds fresh raspberries
- 4 cups granulated sugar
- 1 package (1.75 oz) powdered pectin
- ¼ cup lemon juice (fresh)
- Water as needed
Step-by-Step Recipe Instructions
1.Preparing the Berries:
- Gently wash raspberries in cool water
- Remove any damaged berries or debris
- Place berries in a large pot
- Crush them lightly with a potato masher
2.Extracting the Juice:
- Add ½ cup water to crushed berries
- Heat slowly to a simmer
- Cook for 10 minutes, stirring occasionally
- Pour mixture into a jelly bag suspended over a bowl
- Let drain for 2-4 hours (or overnight for clearest jelly)
3.Making the Jelly:
- Measure exactly 4 cups of strained juice
- Pour juice into a large pot
- Add pectin and lemon juice
- Bring to a rolling boil over high heat
- Add sugar all at once
- Return to full rolling boil
- Boil exactly 1 minute, stirring constantly
- Remove from heat and skim foam
4. Processing:
- Ladle hot jelly into prepared jars
- Leave ¼-inch headspace
- Wipe rims clean
- Apply lids and bands
- Process in boiling water bath for 10 minutes
Pro Tips for Perfect Raspberry Jelly
Berry Selection:
- Use fully ripe but not overripe berries
- Mix different raspberry varieties for complex flavor
- Fresh berries yield best results, but frozen work too
2.Sugar Balance:
- Don’t reduce sugar amounts as it affects setting
- Use regular granulated sugar, not substitutes
- Even distribution ensures proper setting
3.Temperature Control:
- Use a candy thermometer to reach 220°F (sea level)
- Adjust temperature for altitude
- Maintain steady heat throughout cooking
Troubleshooting Common Issues
Jelly Won’t Set:
- Boil again with additional pectin
- Ensure proper sugar ratio
- Check fruit acidity levels
Cloudy Jelly:
- Don’t squeeze jelly bag while straining
- Use fresh, high-quality fruit
- Skim foam thoroughly
Crystal Formation:
- Make sure store is properly sealed
- Use correct sugar proportions
- Process at proper temperature
Storage and Usage
Your homemade raspberry jelly will keep for:
- 18 months in a cool, dark place (unopened)
- 3 weeks in refrigerator (opened)
- Label jars with date and contents
Creative Ways to Use Raspberry Jelly
Classic Applications:
- Spread on scones or toast
- Fill layer cakes
- Glaze fruit tarts
Innovative Uses:
- Whisk into vinaigrettes
- Glaze ham or pork
- Flavor yogurt or smoothies
FAQs
Can I make raspberry jelly without pectin?
Yes, but cooking time increases significantly. Natural pectin in raspberries can set the jelly, but results may vary. Adding apple juice or underripe apples helps achieve proper setting.
Why is my raspberry jelly too sweet?
Standard recipes require sufficient sugar for proper setting and preservation. For less sweet jelly, use low-sugar pectin specifically designed for reduced sugar recipes.
Can I use frozen raspberries for jelly?
Yes, frozen raspberries work well for jelly-making. Thaw completely before using and proceed with recipe as written. Results are nearly identical to fresh berries.
How do I know when my jelly is done?
Test for doneness using the sheet test: dip a cold metal spoon into hot jelly and let it run off. If it forms two drops that flow together (sheets), it’s ready.
Why did my jelly turn brown?
Brown coloration typically occurs from overcooking or improper storage. Ensure proper processing time and store in a dark place to maintain color.
Can I double the raspberry jelly recipe?
It’s not recommended to double preservation recipes as it affects cooking times and setting properties. Make multiple single batches instead.
How long should I process raspberry jelly in a water bath?
Process 8-ounce jars for 10 minutes at sea level, adjusting time for altitude. Add 5 minutes for elevations above 1,000 feet.
Conclusion…
Mastering raspberry jelly-making opens up a world of culinary possibilities. This versatile preserve captures the essence of fresh raspberries in a form that can be enjoyed year-round.
Whether you’re preserving a bumper crop of berries or creating handmade gifts, this recipe provides a foundation for success. Remember that practice makes perfect, and each batch teaches valuable lessons in the art of jelly-making.
By following this detailed guide, troubleshooting tips, and expert advice, you’re well-equipped to create delicious, crystal-clear raspberry jelly that will delight family and friends and rival any store-bought version