
Ever wanted to try out your very own plum jelly and savor the taste of your own creation? Say no more, because today, we will be discussing just that!
There’s something truly magical about transforming fresh, ripe plums into glistening, jewel-toned jelly. This classic preserve captures the essence of summer fruit in a jar, offering a perfect balance of sweet and tart flavors that elevate everything from your morning toast to sophisticated culinary creations.
While store-bought versions certainly have their place, nothing quite compares to the satisfaction and superior taste of homemade plum jelly. Not only does making your own allow you to control the ingredients and sugar content, but it also lets you create a preserve that’s free from artificial preservatives and pectin (if you so choose).

Ingredients Needed
The beauty of plum jelly lies in its simplicity. At its core, you’ll need:
- 4 pounds of fresh, ripe plums (choose plums that give slightly when pressed)
- 3-4 cups of granulated sugar (adjust based on plum variety and personal preference)
- ¼ cup fresh lemon juice (crucial for both flavor and natural pectin activation)
- 4 cups water
- 1 package powdered pectin (optional, as plums are naturally high in pectin)
For those feeling adventurous, consider these optional flavor enhancers:
- 1 cinnamon stick
- 1 vanilla bean, split lengthwise
- 2-3 whole star anise
- For depth, add a little port wine.
Equipment Required
Before beginning your jelly-making adventure, gather these essential tools:
- Large, heavy-bottomed stockpot or preserving pan
- Fine-mesh strainer or cheesecloth
- 6-8 half-pint (8 oz) mason jars with new lids
- Large ladle and wide-mouth funnel
- Candy or digital thermometer (recommended for precision)
- Jar tongs and jar lifter
- Clean kitchen towels
- Large bowl or measuring cup for juice collection
Step-by-Step Instructions
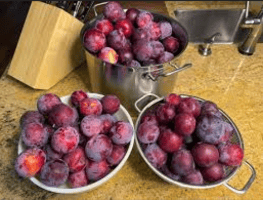
Step 1: Preparing the Plums
Begin your jelly-making journey by selecting plums at their peak ripeness. They should be fragrant and yield slightly when pressed but not be overripe. Wash them thoroughly under cool running water, removing any stems or blemished areas.
Quarter the plums by cutting into four equal parts, leaving the skins on – they’ll contribute both color and flavor to your final product. While removing the pits, save any juice that escapes; every drop counts toward your perfect jelly.
Step 2: Cooking the Plums
Place your quartered plums in your stockpot along with the water. If you’re using any whole spices, add them now.
Bring the mixture to a boil over medium-high heat, then reduce to a gentle simmer. Cook for 20-25 minutes, occasionally stirring and gently mashing the plums with your spoon as they soften.
You’ll notice the water taking on a beautiful crimson color as the plums break down. Once the plums are completely soft, remove from heat and let cool slightly.
Set up your straining station:
- Line a large colander with several layers of cheesecloth and position it over a large bowl.
- Carefully pour the plum mixture into the cheesecloth.
- For the clearest jelly, resist the urge to squeeze the cheesecloth; let gravity do the work. Allow the juice to drain for at least 2 hours, or overnight in the refrigerator for best results.
Step 3: Making the Jelly
Measure your extracted juice; this is crucial for proper setting. For every cup of juice, you’ll need about ¾ cup of sugar (adjust to taste) and 1 tablespoon of lemon juice.
Pour the measured juice into a clean, wide preserving pan. Add the sugar alongside the lemon juice, stirring until the sugar dissolves. Bring the mixture to a full rolling boil over high heat, stirring constantly to prevent scorching.
If using commercial pectin, add it now and return to a full boil for exactly one minute. If going the natural route, continue cooking until the jelly reaches its setting point.
Step 4: Testing for Doneness
There are several reliable ways to test if your jelly has reached the setting point:
- Temperature Test: Use a candy thermometer to check for 220°F (104°C) at sea level
- To perform the cold plate test, put a little plate in the freezer. Drop a teaspoon of hot jelly onto the cold plate, wait 30 seconds, then run your finger through it. If it wrinkles and maintains its shape, it’s ready
- Spoon Test: Dip a cold metal spoon into the hot jelly and hold it horizontally. If the jelly sheets off in drops that flow together, it has reached the setting point
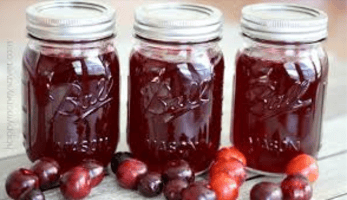
Step 5: Canning and Storing
While your jelly is cooking, prepare your jars and lids according to proper canning guidelines. Keep the jars hot until it’s ready to fill. Using your funnel and ladle, carefully fill each jar, leaving ¼ inch head space.
Wipe the rims clean with a dampened paper towel, center the lids, and screw on the bands until just tight. Process the filled jars in a boiling water bath for 10 minutes (adjust for altitude if necessary).
Remove jars carefully and place on a towel-lined counter away from drafts. Let cool completely, undisturbed, for 12-24 hours. Check seals before storing.
Tips for Perfect Plum Jelly
- Choose plums wisely: Different varieties will yield different flavors. Italian prune plums make a deeply flavored jelly, while Santa Rosa plums create a brighter, more tart preserve
- For clearer jelly, avoid squeezing the fruit during straining – let gravity do the work
- If your plums are very sweet, reduce sugar accordingly; if they’re tart, you might need to add more
- Store unopened jelly in a cool, dark place for up to one year
- After opening, keep chilled and use within three months.
Serving Ideas & Variations
Your homemade plum jelly is versatile enough to shine in both sweet and savory applications:
- Spread it on warm, buttered sourdough toast or fresh croissants
- Use it as a glaze for roasted pork or duck
- Swirl into plain yogurt or oatmeal for breakfast
- Fill thumbprint cookies or layer between cake tiers
- Mix with olive oil and vinegar for a unique salad dressing
- Serve alongside aged cheeses on a charcuterie board
FAQs
What is the best type of plum for making plum jelly?
The best types of plums for jelly are European plums like Damson, Italian, or Santa Rosa varieties. These plums have high natural pectin, making them ideal for setting into jelly.
How do I thicken plum jelly if it doesn’t set?
If your plum jelly doesn’t set, return it to the heat and add a tablespoon of lemon juice and additional pectin. Boil for 1-2 minutes and retest the set using the spoon method.
How long does homemade plum jelly last?
When properly sealed in sterilized jars, plum jelly can last up to 12 months in a cool, dark place. Once opened, store it in the refrigerator and consume within 3 weeks.
Do I need to add pectin to make plum jelly?
Plums naturally contain pectin, so you may not need to add extra. However, if the plums are under ripe or you prefer a firmer jelly, adding pectin can help.
Can I freeze homemade plum jelly?
Yes, plum jelly can be frozen in airtight containers for up to 12 months. Leave at least ½ inch of space at the top of the container to allow for expansion during freezing.
What can I use plum jelly for?
Plum jelly is versatile and can be spread on toast, used as a glaze for meats, added to yogurt, or even incorporated into desserts like thumbprint cookies.
How long does it take to make plum jelly from scratch?
On average, it takes about 1.5 to 2 hours, including cooking, straining, and processing in jars.
Conclusion…
Creating your own plum jelly is more than just preserving fruit, it’s about capturing the essence of summer in a jar. While the process requires patience and attention to detail, the result is definitely rewarding.
Each batch will be uniquely yours, reflecting the character of your chosen plums and any special touches you add. Don’t be afraid to experiment with different varieties and flavor combinations.
Whether you’re an experienced preserve maker or trying your hand at it for the first time, the satisfaction of spreading your own homemade plum jelly on a piece of toast is unmatched.
Happy preserving!